Note: This is an old post that I had to do for an undergrad project, I want to leave it here as something to compare my newer work to. Enjoy!
For the 4th year of my MSci I’m working in the Tewari lab. A lab that specialises in understanding specific proteins, their roles and locations in Plasmodium, the group of parasites that causes malaria. One of the most useful tools used is fluorescent microscopy. The protein we are interested in is tagged with a fluorescent label, then viewed under a microscope. When excited by the microscope the tag, attached to our protein glows, allowing clear visualisation of the protein. If we also tag known proteins (in a different colour) we can deduce the location of our proteins. We can then compare locations and begin to speculate interactions and roles for our protein of interest. The entire process, while it may be routine for many cellular biologists, is surprisingly complex, involving gene editing, cloning, and requires multiple different organisms, taking up to two weeks to complete.
1. Finding and acquiring our gene
In order to get the parasite to express the protein with the tag, the gene that codes for the protein of interest must be isolated from the parasite. We often start with a gene of interest, and then work towards finding the encoded protein, the sequence that we are looking for should already be known. In the case of Plasmodium, the genomes of many species have been sequenced (the bases have been read, and stored as a text document); the sequence along with other information can be accessed by the online database PlasmoDB, finding the sequence is as simple as a quick search.
Once the sequence information is known, the physical DNA can then be acquired. The process to acquire the DNA is called PCR (Polymerase Chain Reaction) and essentially hijacks the DNA’s ability to replicate. The 4 subunits of DNA (nucleotides) form pairs with each other (A always pairs with T, G always pairs with C) because of this nature, a single strand of DNA can be used to produce a second (its reverse strand). A polymerase enzyme moves along the single strand inserting the matching nucleotide and joining it to the previous one. For PCR a primer is generated, this is a short sequence of DNA (20 nucleotides) at the start of the region we are interested in. A second primer is then generated at the end of the sequence on the opposite strand. These can be purchased online. The region that we are interested in isolating will be a fragment that encompasses the end of the gene, importantly it won’t contain the nucleotide sequence that signals the end of the gene, this should make sense later. Then purified DNA from the parasite, our primers, free nucleotides and a heat stable DNA polymerase (isolated from single celled organisms that live near underwater volcanic vents) are all mixed and placed in a PCR Machine. This machine cycles between high temperatures (that cause the DNA strands to separate) and lower temperatures that allow the polymerase to function and create new strands, this process is then repeated. The area between our primers is replicated until it outnumbers the rest of the DNA in our sample.
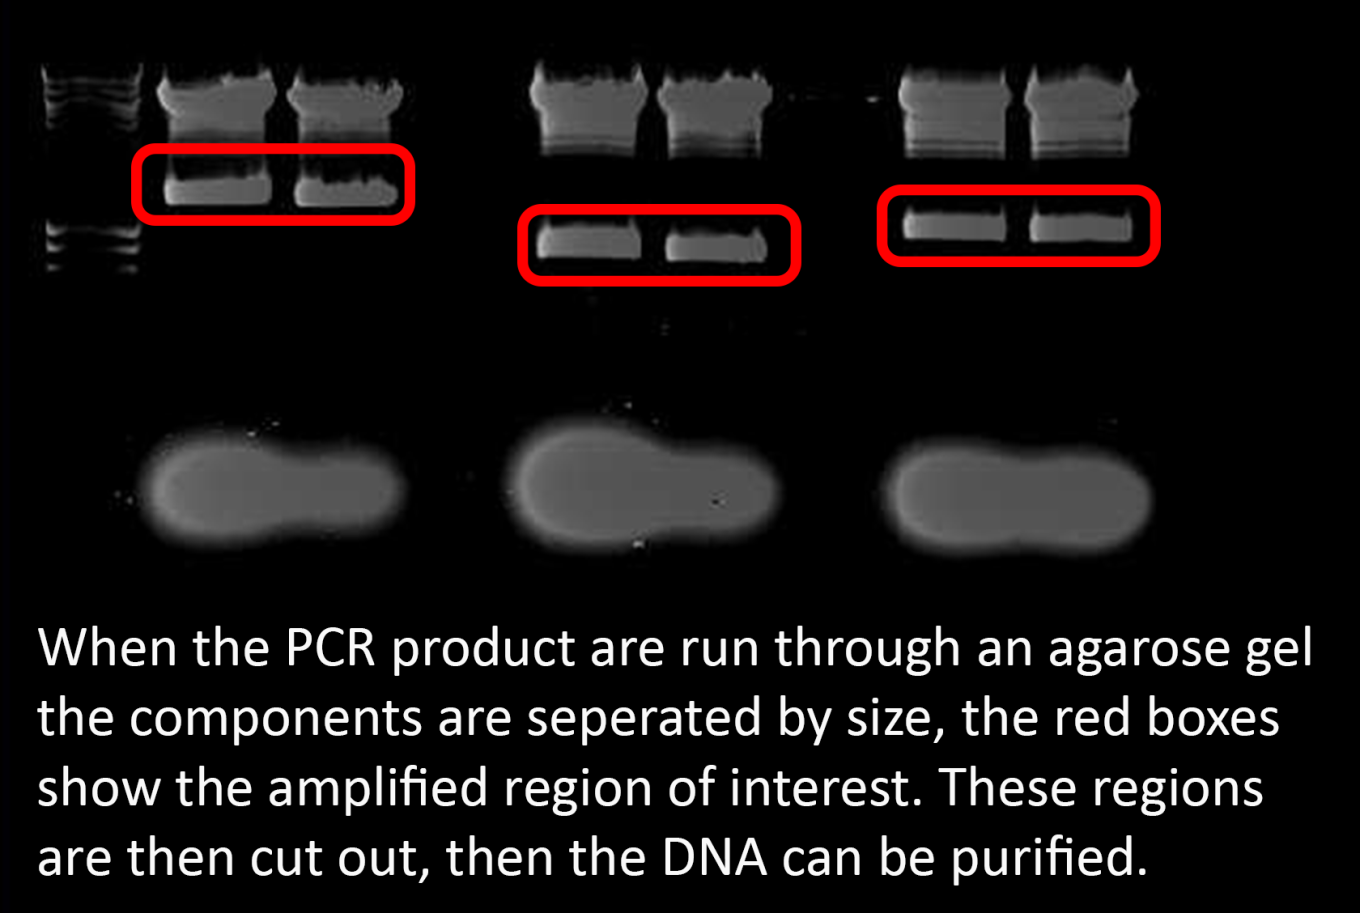
The sample is then run through a gel that separates the DNA by size using an electric current. Our PCR product can be visualised as a strong band in the gel, this can then be cut out, and purified from the gel using readily available kits. We now have our DNA purified and ready to modify.
2. Inserting our gene into a Plasmid and cloning in bacteria
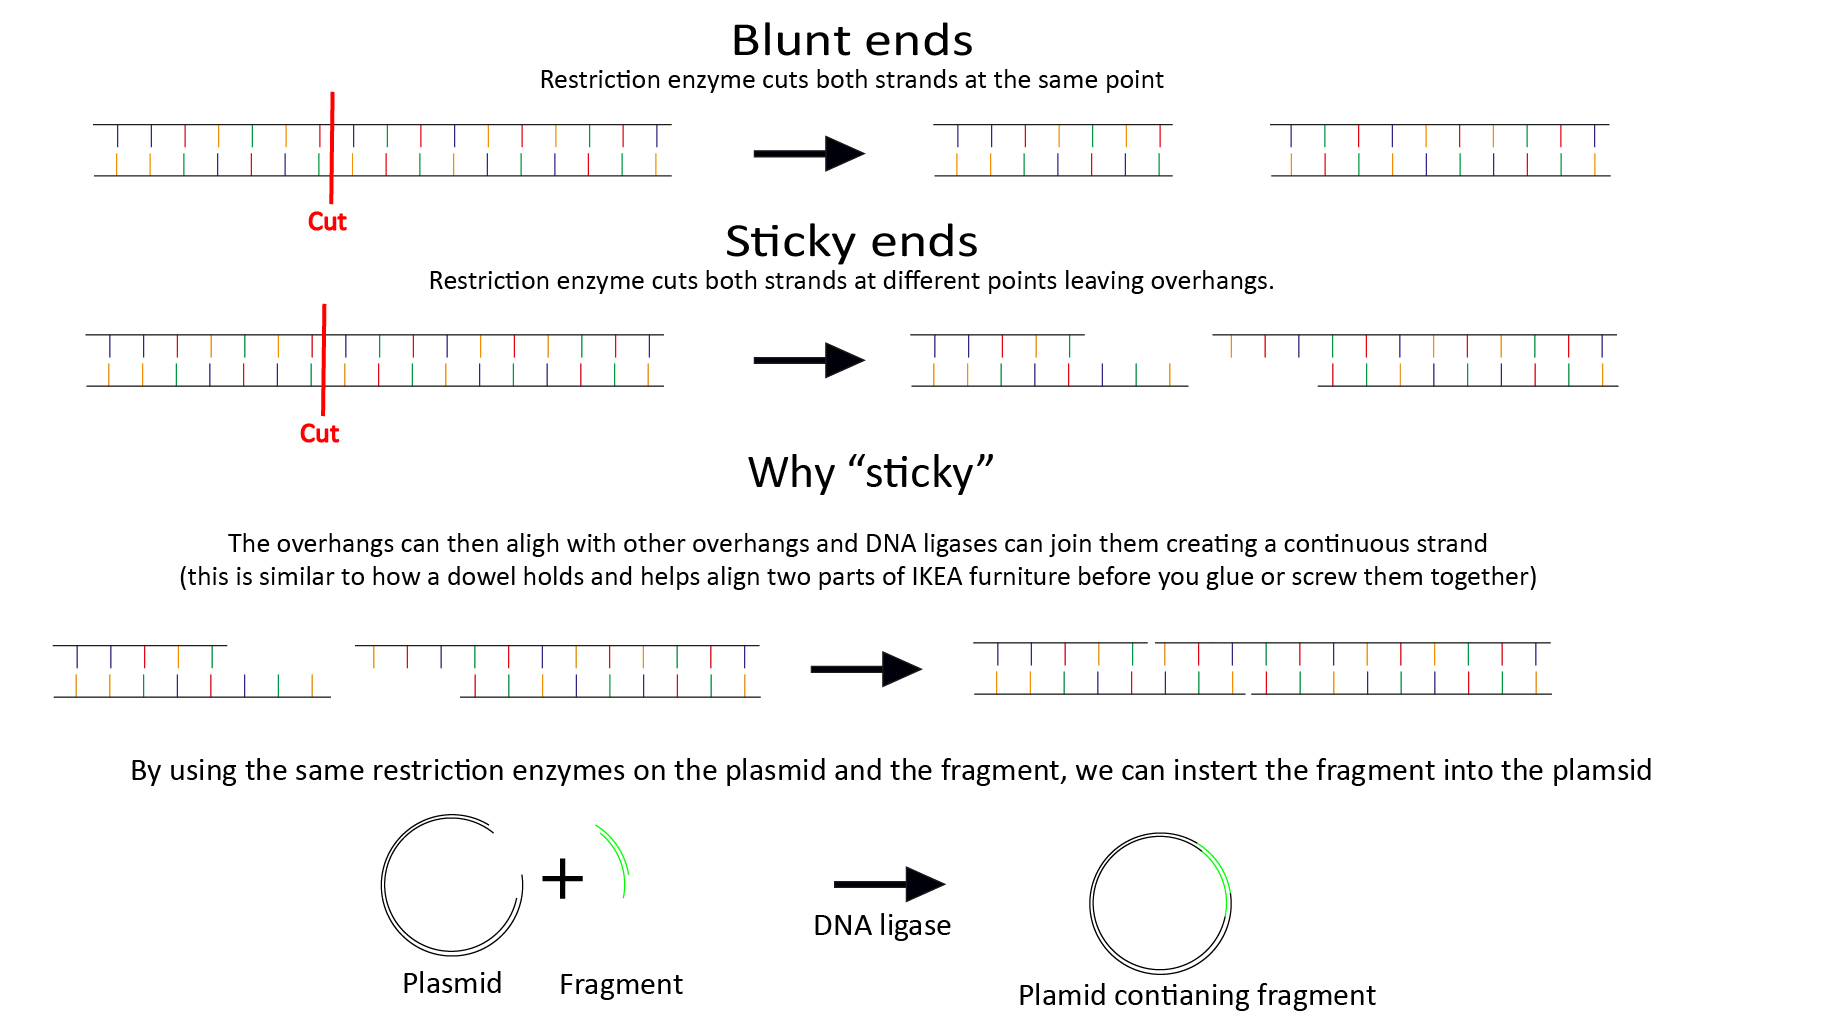
Plasmids are small loops of DNA that are found in bacteria, they are used by the bacteria to store and exchange DNA with other bacteria (such as antibiotic resistance genes, or toxin genes) . Importantly for us, they can be easily taken up by bacteria and replicated with a high accuracy. Our isolated DNA is inserted into a plasmid containing a GFP gene, Ampicillin resistance gene, and hDHFR (provides resistance to the antibiotic trimethoprim). Restriction enzymes (enzyme = proteins that facilitate chemical reactions) cut out DNA at a specific [restriction] site, they are our molecular scissors. Restriction enzymes can be specific to a unique sequence. They can also leave ‘sticky ends’ , cutting both strands in different places, leaving overhangs that can align. To insert our DNA fragment into the plasmid, we need two restriction enzymes that produce sticky ends, that only cut our fragment in one location but also cut our plasmid in the multiple cloning site (MCS) a region adjacent to the GFP gene, that contains ~20 common restriction sites. Many online tools exist where you can search your sequence for enzymes that only cut in one location.
The sticky ends of the plasmid and the fragment align allowing the DNA ligase (our molecular glue stick) to join the strands together. The plasmid can now be inserted into bacteria This process usually requires a kick start, such as temperature shock, or a quick electric zap. The bacteria are then cultured in a solution containing ampicillin. The ampicillin resistance gene confers resistance to only the bacteria that have taken up our plasmid, this is referred to as a selection pressure.
3. Getting our tagged gene into the plasmodium genome
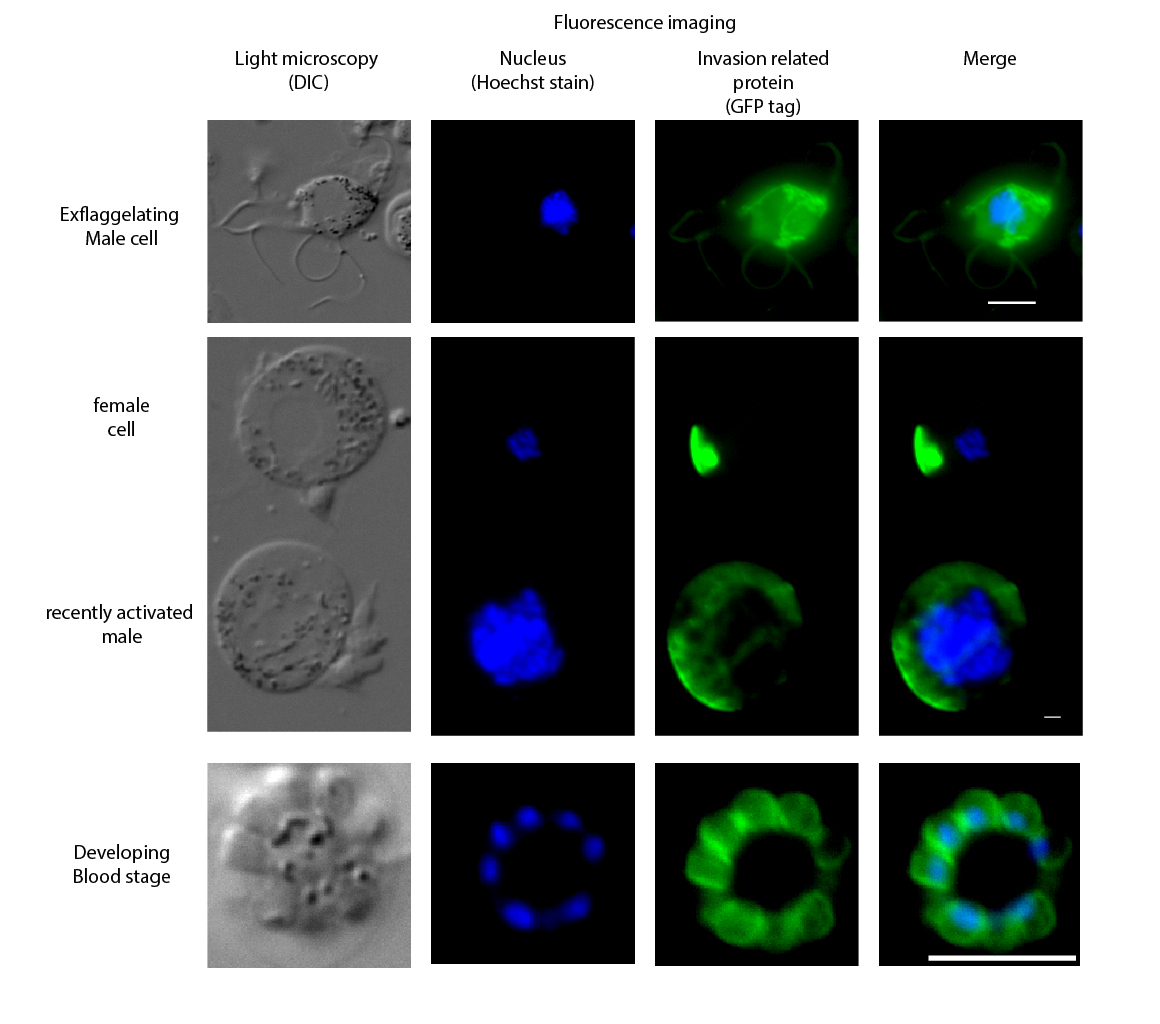
After 24hrs, the bacteria are lysed (broken down) and the plasmids are purified, this can be done with filters provided in a kit. Again, restriction enzymes are used, this time the enzymes cut at a site unique to the protein of interest, and somewhere downstream of the hDHFR gene, this produces a linear DNA fragment. This fragment can then be mixed with the parasite. In our case we are using Plasmodium berghei rodent infecting species of malaria. The DNA is inserted into the parasite using an electric shock. Once inside the parasites it can be inserted into the parasites genome using a process called homologous recombination (a natural DNA repair process that uses other bits of DNA as a template). During DNA replication the fragment lines up with the endogenous gene and our construct is swapped with the endogenous gene. While the parasite is growing, we apply a selection pressure by treating the mice with trimethoprim the hDHFR gene in our construct confers resistance to this pressure. As the parasite grows, the proteins produced from our gene, also produce the GFP tag, that allow us to visualise expression and location of our protein. After 3-4 days the blood can be collected, and cultured in the lab for up to 24hrs to allow for imaging of the parasites at many different stages. The images seen below are of invasion associated proteins in P. berghei, a blue stain called hoescht is used to stain the DNA in the nucleus blue.